Back from the retreat - what a great time we had - again! This time we didn't have a mystery quilt, but lots of make and takes. I chose not to do all of them and instead concentrated on working on some UFOs I brought along to finish or get further along with. The first project consisted of my leaf mug rugs - I'll show those tomorrow in Applique Tuesday. I then did:
This was a panel I was given at the last St. Anne's meeting. I just needed to bind it. Er, that's what I thought as it was pre-quilted. But! The panel sides had to be evened up. You can see how that went. I'm sure baby won't mind. Then I had to make the binding from assorted reds. Had just enough. Used a new method to attach the binding using an s-curve stitch. It went great. I'll demo that in another post. Then after a good look at the quilting, discovered that it's coming undone at two ends so that needed to be fixed, too.
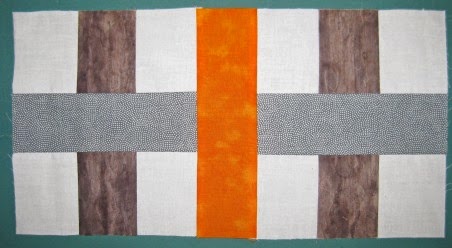
Next UFO was an 8 year old one for which my niece chose the fabric, laid out the order of the blocks, then left for me to put together. Well, it is now done. I call it Medallion Cherries.

I then tackled the hardest - yes, the hardest UFO. This was a bag of blocks, fabric and batting and backing squares from an estate sale. The project dates from the 50s. At least that's what I think because of all the polyester and cotton fabrics and the prints. The quilter had made 6 blocks plus the makings for 4 more plus a ton of cut strips for many more. I measured and they ranged from 14.5 to 13". Of course I cut them down to 13. She had made the blocks for a QAYG quilt. This would usually be easy peasy for me, BUT she use a very high loft polyester batting - typical of the 50s. After making 3 more blocks, I started to put them together. Ugh, first attempt using the no front sashing method did not work. The seam was a mess because of the batting and trying to sew through so many layers. After some thought, I decided to use the sashing on both sides method and baste the individual parts together - ie sashing strip and left block, then sashing back strip and next block. Then I sewed the blocks together with a larger stitch - 3 instead of my normal 2.2 You can see the first row at the top of the photo. Will be 39" square when done.

I did make this Make and Take. Just couldn't resist. Went together so neatly and I love my little box. This starts as two 8 1/2" squares of fabric. The ladies were told to use 10" squares, but I only had enough to make the smaller one.
As I make the other Make and Takes I'll share them with you. Even though this was only my second one, my conclusion: I love going on retreats!
I'm linking to Judy's
Patchwork Times and Lyn's
BOMs Away as I did deal with blocks.
Blessings as you start this new week.